That split-second when the pan spits oil at your wrist, or when curiosity meets a hot iron — minor burns happen fast and hurt instantly. Most people’s first instinct is to grab something cold or reach for whatever cream is nearest. That instinct, while completely understandable, often makes things worse. Treating a minor burn correctly in the first few minutes makes a real difference to both pain levels and healing time. This guide walks through the right steps: cooling the burn properly, choosing the right covering, managing discomfort, and recognising when home care reaches its limits.
Step 1: Stop the Burn and Stay Safe
Before anything else, remove yourself or the affected person from the heat source. Whether the burn comes from a flame, hot liquid, a hot surface, or steam, distance matters immediately. Then take these steps in order:
- Remove loose clothing and jewellery near the burn straight away. Heat travels through fabric and metal. Rings, watches, and tight sleeves near a burn trap warmth and increase tissue damage — act quickly here.
- Never pull at clothing stuck to the skin. If fabric clings to the burned area, leave it in place. Pulling it away tears skin layers and deepens the wound. Leave that removal to a medical professional.
- Strip soaked clothing fast. Hot liquid soaks into fabric and holds heat against the skin, continuing the burning process. Remove saturated clothing as quickly as possible to stop this.
- Use your hand to assess size. If the burn covers an area smaller than your own palm, home treatment is likely appropriate. If it spreads wider, start cooling and seek help simultaneously rather than waiting.
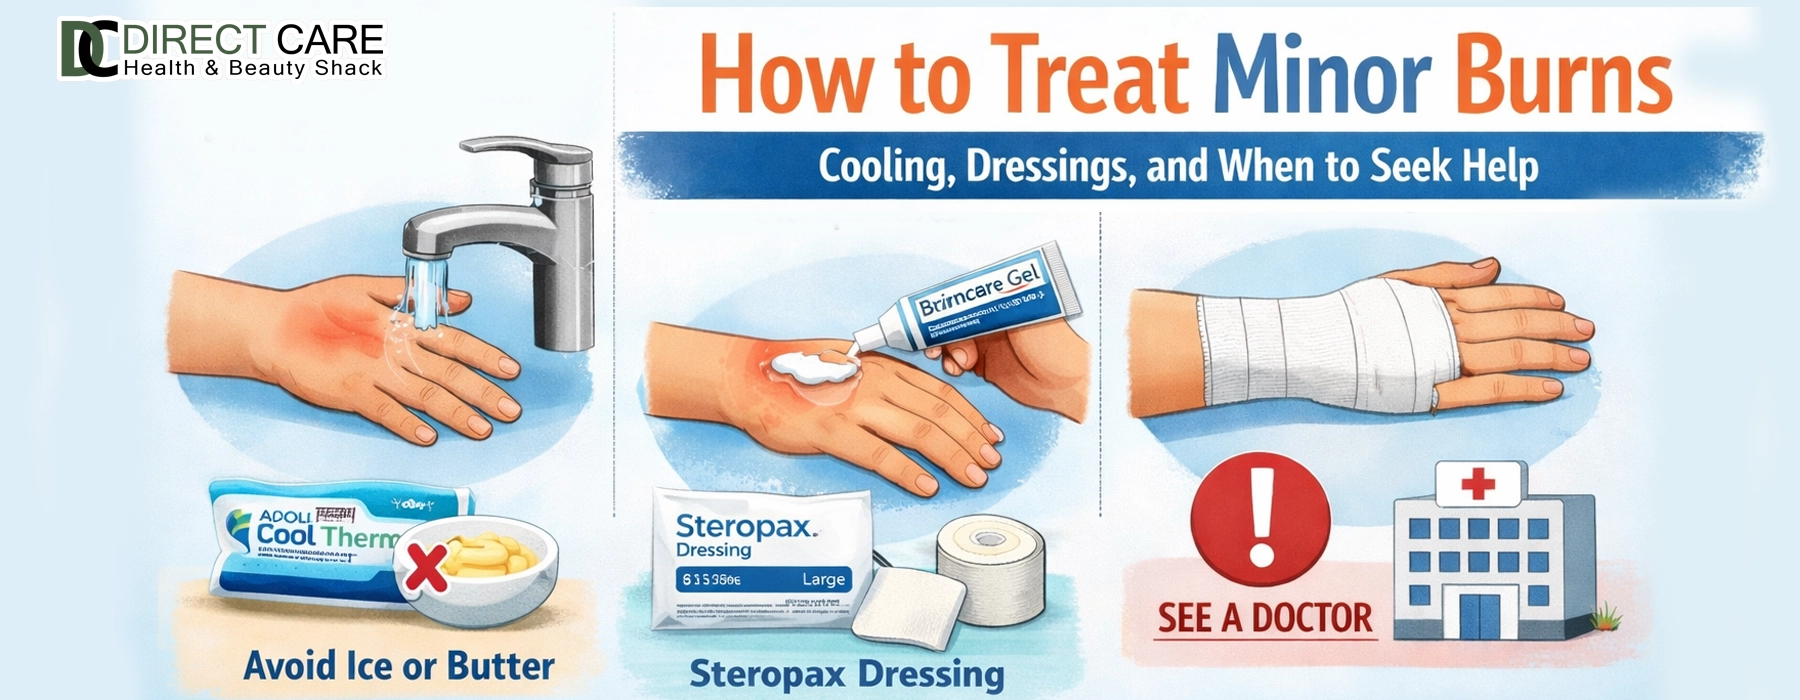
Step 2: Cool the Burn
Cooling is the single most important step in minor burn treatment. It reduces pain, limits tissue damage at a cellular level, and prepares the skin for dressing. Do this correctly:
- Hold the burned area under cool running tap water for 20 minutes. A gentle, steady flow of cool — not cold — water draws heat out from deeper skin layers and slows the burning process that continues beneath the surface after contact ends.
- Begin cooling within three hours of the burn. NHS guidance confirms that cooling remains effective up to three hours after a burn occurs. Even if time has passed, running water over the area still helps.
- Never use ice or iced water. Extreme cold constricts blood vessels and cuts circulation to already damaged skin. It causes secondary injury and increases pain rather than reducing it.
- Skip butter, oils, toothpaste, and household creams at this stage. These seal heat inside the skin rather than releasing it. They also introduce bacteria and interfere with how medical professionals assess burn depth during any follow-up.
- Keep the rest of the body warm while cooling the burn. Use a blanket or spare clothing to maintain overall comfort. Sustained cooling over a large area risks lowering body temperature, particularly in young children and older adults.
- Avoid fluffy towels or cotton wool directly on the burn. Fibres stick to damaged skin and complicate cleaning later. Reserve smooth coverings for after the cooling period ends.
Step 3: Cover the Burn Properly
Once the 20-minute cooling period ends, protecting the skin becomes the priority. The goal shifts to preventing contamination, reducing pain from air contact, and allowing the skin to begin healing without interference.
- Pat the area dry gently with a clean cloth. Light dabbing removes moisture without disturbing the wound surface. Rubbing or pressing causes unnecessary irritation to already sensitive tissue.
- Apply a thin layer of burn cream after cooling and before covering. A cream containing chlorhexidine gluconate — such as Savlon Burns and Scalds Cream — provides antiseptic coverage that reduces the risk of infection in minor burns, scalds, blisters, and abrasions. Apply it as a first barrier before dressing.
- Lay cling film loosely over the burn in a single layer. Cling film does not stick to the wound, allows visual monitoring of the area without removing the covering, and keeps bacteria out effectively. Never wrap it tightly, as this restricts circulation.
- Use a clean plastic bag for burns on the hand or fingers. Slide the bag over the hand loosely and secure it lightly at the wrist. This protects the burned area while preserving some movement and comfort during the wait for further care.
- Leave blisters completely intact. Blisters form as the body’s natural shield over damaged tissue. Breaking a blister removes that sterile protective layer and opens the wound directly to bacterial entry.
- Change dressings daily and inspect the wound each time. Clean your hands before touching the area. Look for any redness spreading outward from the original burn site, as this signals a developing problem rather than normal healing.
Step 4: Manage Discomfort at Home
Pain and soreness following a minor burn are expected. Managing discomfort well helps the healing process and reduces the urge to interfere with the wound or the dressing.
- Take paracetamol or ibuprofen following the packet instructions. Both address pain effectively. Ibuprofen also reduces inflammation in the tissue surrounding the burn site, which helps with swelling in the early stages.
- Do not give aspirin to anyone under 16. This applies to burn-related pain management in children and teenagers across the board. Aspirin carries a risk of a condition called Reye’s syndrome in under-16s.
- Reapply burn cream at each dressing change. Ongoing antiseptic coverage through the healing period reduces the chance of infection taking hold as new skin forms. Apply a thin, even layer before replacing the clean dressing.
- Wear loose, breathable layers over the healing area. Friction from tight fabric slows skin recovery and irritates healing tissue. Keep the area covered but free from pressure.
When to Stop Home Treatment and Seek Help
Home care works well for minor burns. However, certain burns go beyond what first aid safely manages. These signs call for medical attention:
- The burn covers a wider area than your hand. Size guides the decision clearly. Larger burns mean greater fluid and heat loss, and the body cannot compensate for this without support.
- The burn sits on the face, neck, hands, feet, joints, or genitals. These locations carry a higher risk of infection, affect movement and function, and involve delicate structures that benefit from specialist assessment.
- The skin looks white, brown, or black, or feels numb. These changes in colour and sensation point to a deeper burn. An absence of pain in a burned area is a warning sign, not reassurance — it often means nerve endings have sustained damage.
- A chemical or electrical source caused the burn. These burns need emergency assessment regardless of visible size. Chemical burns continue to damage tissue until fully neutralised, while electrical burns affect internal structures even when the skin looks superficially minor.
- Signs of shock appear. Pale or clammy skin, rapid shallow breathing, dizziness, or confusion after a burn all point to shock. Lay the person flat, keep them warm, and call 999 immediately.
- The injured person is under 10, over 65, or lives with a condition such as diabetes or heart disease. These groups face higher complication risks from burns, and early advice from a GP or NHS 111 reduces those risks significantly.
- The burn shows no improvement after two weeks. Most minor burns heal within a fortnight. A wound that stalls, smells unpleasant, or worsens beyond this timeframe needs professional review.
Common Burn Treatment Mistakes
These errors are common and easy to make under pressure. Knowing them helps avoid setting recovery back:
- Applying ice. Ice sticks to wet, damaged skin and causes cold injury directly on top of the existing burn.
- Using home remedies like vinegar, egg whites, or milk. These introduce contamination and do nothing constructive to cool or heal burn tissue.
- Wrapping the area tightly with bandages. Tight dressings cut off blood flow and add pressure to a wound already dealing with swelling.
- Popping blisters. This removes the body’s own sterile covering and exposes raw tissue directly to bacteria in the surrounding environment.
- Reaching for cream before cooling. Burn cream works as aftercare, not as a first response. Running cool water for 20 minutes always comes first — cream follows only after that step is completed.
- Ignoring pain that spreads beyond the burn site. Discomfort that moves outward or redness that fans across surrounding skin signals infection rather than the natural progression of healing.
First Aid Starts With Being Prepared
Treating a minor burn comes down to speed, calm, and the right supplies within reach. Cool water, a clean covering, and reliable aftercare make the biggest difference in how fast skin recovers. Stocking your home first-aid kit with the essentials means less panic when a burn happens and more confidence in acting correctly. Savlon Burns and Scalds Cream supports minor burn recovery by reducing infection risk and soothing the skin once cooling is complete. Browse through our range of first-aid essentials to make sure your kit stays ready — because good self-care begins before the burn happens.